If you’re looking for a way to attract some beneficial bugs to your garden, then you need to make a DIY bug hotel! These houses are easy and fun to make, and they provide a great place for beneficial insects to live. Plus, they can also make an interesting and attractive addition to your garden landscape. So, if you’re interested in learning how to make an insect house, keep reading!
What is an Insect House?
An insect house, also sometimes called a bug house (or even a bug hotel), is a structure that provides shelter and nesting areas for beneficial insects. These houses can be made from a variety of materials, but they all have one thing in common: they provide a safe place for insects to live.
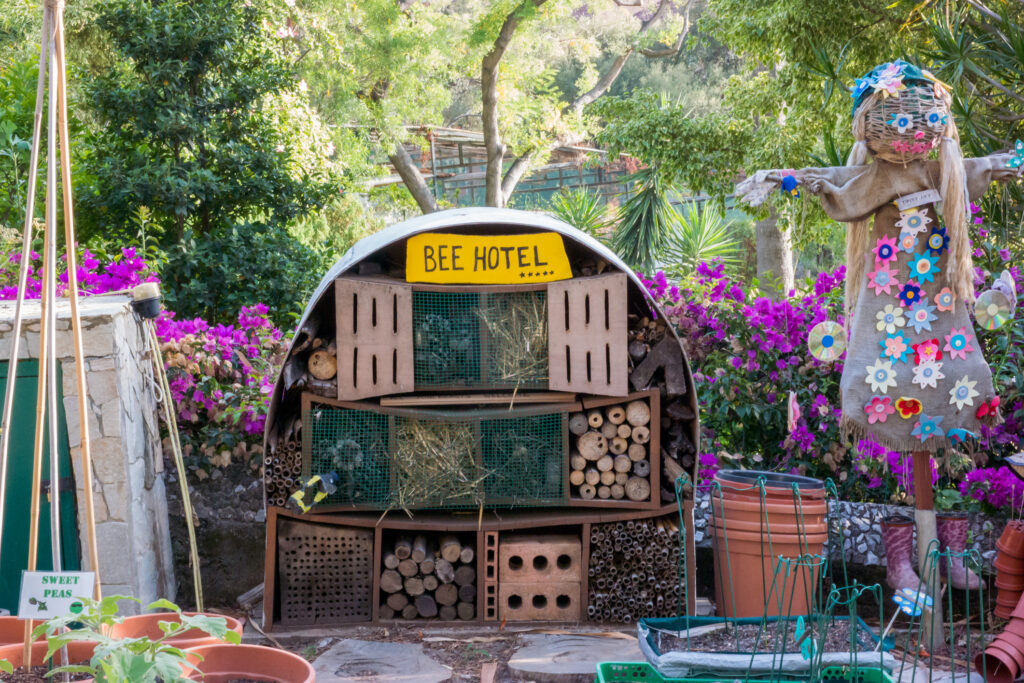
They come in all shapes and sizes and can be simple or complex. Of course, you could simply buy one, but building your own can be a fun and rewarding project. You can build an insect house to suit the space you have and they can be placed in your garden, on your porch, or even on a terrace or balcony area.
The Benefits of Insect Houses
There are many benefits to having an insect house in your garden. First, they provide a safe place for beneficial insects to live. These insects can help pollinate your plants, control pests, and aerate the soil.
Second, they can be used as a way to attract birds and butterflies, who can then in turn bring other benefits to the garden.
Another important thing to consider is that insect houses can be a really fun and hands-on way to get kids to learn about nature and teach them the importance of insects in the ecosystem.
How to Build an Insect House
The design and construction of your insect house will most likely depend on the space and materials you have available. Of course, t doesn’t have to look like an actual house. However, there are a few common things that are essential for all designs:
Make a Base Structure
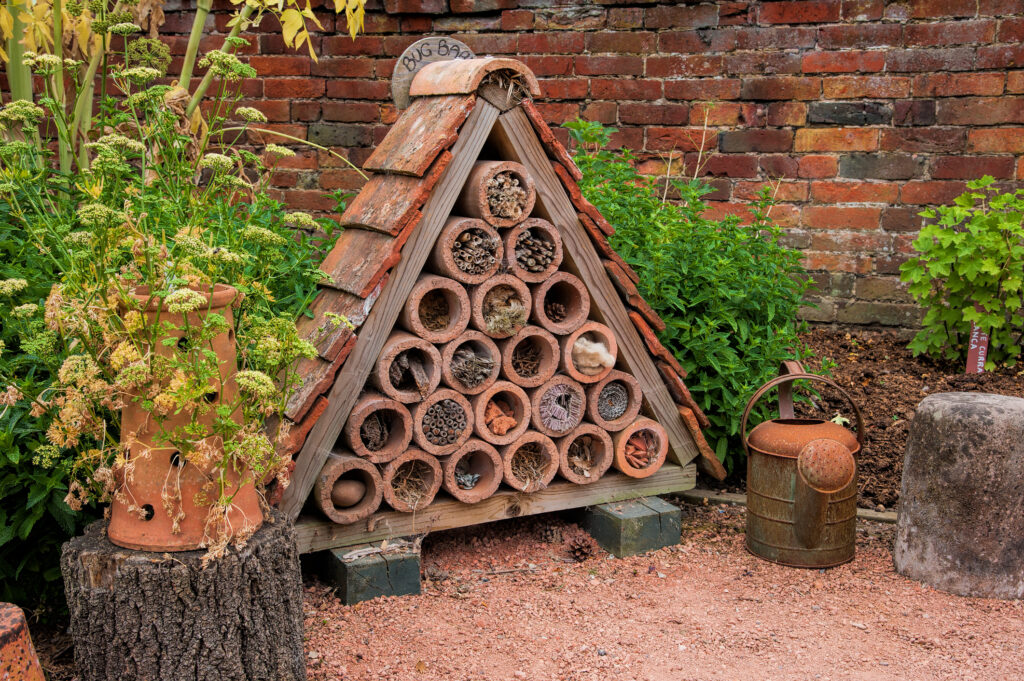
This can be made from wood, bricks, piles of logs or stones, or even recycled materials like plastic bottles or yoghurt pots. You just need to create a basic structure which can then be filled out with other bits and pieces. The structure should be strong enough to withstand the wind and rain without falling over or collapsing.
Create Holes and Crevices
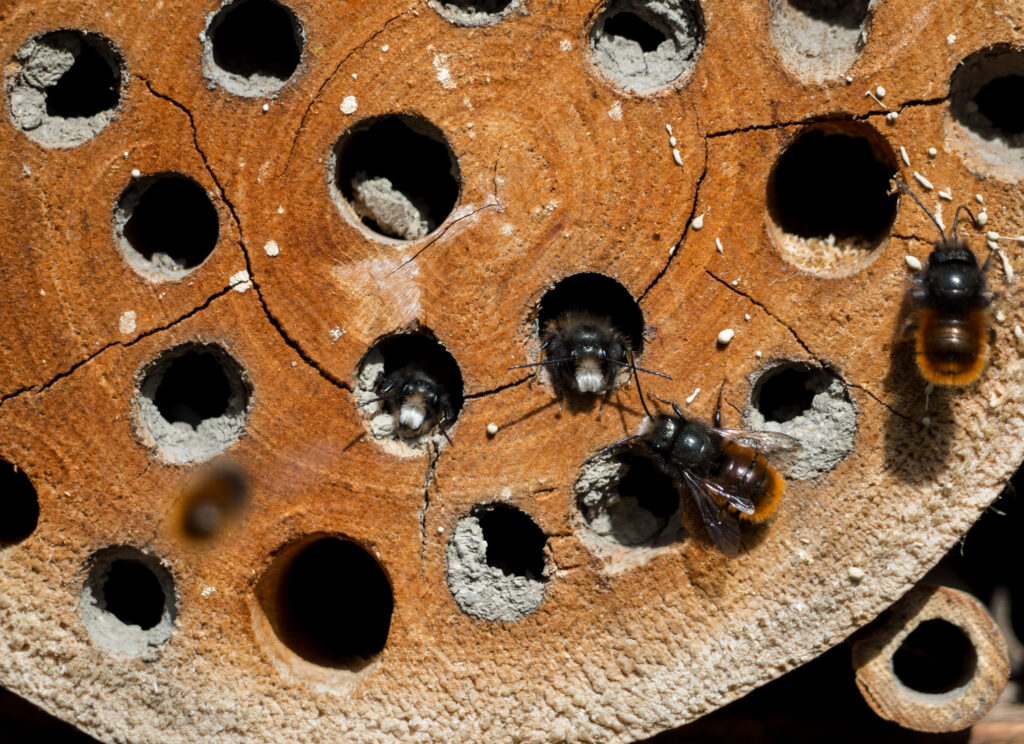
You’ll need to drill or cut holes into the base material to create places for insects to nest. You can also create small crevices to suit a variety of insects and small creatures by adding different materials within the main structure.
Add a Roof or Cover
This will protect the insects from the elements and predators. It can be made from a variety of materials like wood, slate, or even recycled materials like plastic bottles or yoghurt pots. The biggest benefit of covering the top of your insect house is keeping everything dry and warm for hibernating insects underneath.
What materials do you need to make an insect house?
Time for a scavenger hunt! Here are some ideas for some materials you might use:
Timber
If you have any old pieces of timber laying around, then these can make a great base for your bug house. You might have offcuts from other DIY projects, broken fence panels, broken furniture or even wooden pallets can be a great place to start.
Besides making a structure or frame for your house, you could also drill holes in a block of wood for solitary bees to nest in. Things like woodlice might also enjoy feeding on rotting wood.
Bricks and Paving Slabs
Another great way to make a sturdy base for your house is by using bricks or paving slabs. If you have any old ones laying around that you don’t need, then they can be put to good use here. You can use them to create a wall or foundation for your house, or even make a stand-alone structure.
Rocks and stones
Piling up rocks and stones can also make a great base for your insect house. This might be a good option if you want to build something that looks more like it belongs in the wild!
Cavities between rocks are perfect for things like ladybirds, lacewings and earwigs. You could even add some water to create a small pond for reptiles and amphibians like newts.
Bamboo Canes
If you have any spare bamboo canes, then these can make great places for insects to climb up and down. You could even use them to create different levels or compartments within your house.
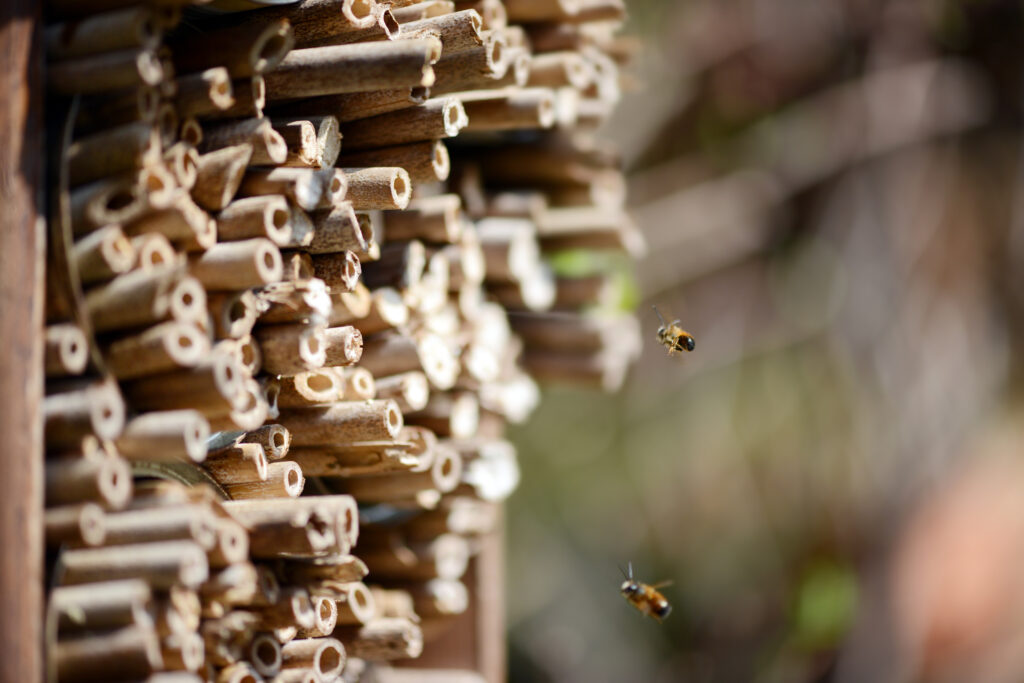
Hollow stems are perfect for solitary bees to lay their eggs in. Clip them down into short lengths – a few inches long – and then stack them together.
Pine Cones
Pine cones can make a great addition to your insect house. They provide a nice place for insects to hide and also act as a source of food for some creatures.
Logs
Old logs are perfect for all sorts of insects, especially beetles who like to lay their eggs in decaying wood. Look for logs that are starting to rot as these will be the most appealing to insects.
Leaves
Dead leaves are a great source of material for filling up your insect house. You can stuff them into any nooks and crannies or use them to line the bottom of your structure.
Grass Clippings
Another great way to fill up any empty spaces in your insect house. You can also use them to line the bottom of your structure.
Hay or Straw
Perfect for filling up any larger spaces in your insect house. You can also use hay or straw to line the bottom of your structure.
Cardboard Tubes
These make great homes for all sorts of insects, from solitary bees to earwigs. You can use toilet rolls, paper towel rolls or even cardboard tubes from wrapping paper. Just make sure to stuff them full of leaves, grass or hay for extra insulation.
Recycled Materials
You can use all sorts of recycled materials to make your insect house. Plastic bottles, yoghurt pots, and old plant pots can all be repurposed into homes for insects. Just make sure to drill some holes in the sides for ventilation.
You might find that you’re lucky enough to have everything you need to make an insect house laying around in your garden. There are no hard and fast rules as to which materials you could use, but in general, it’s best to look for natural materials that insects would find in the wild. However, you could also incorporate things like old plant pots and other recycled materials.
Now that you’ve gathered all your materials, it’s time to start building!
Insect House Ideas
Coming up with creative ways to use the materials you have is half the fun when building an insect house. However, there’s nothing wrong with borrowing some ideas that have already been tried and tested. Here are some ideas to get you started…
Design 1: The Log Pile Insect House
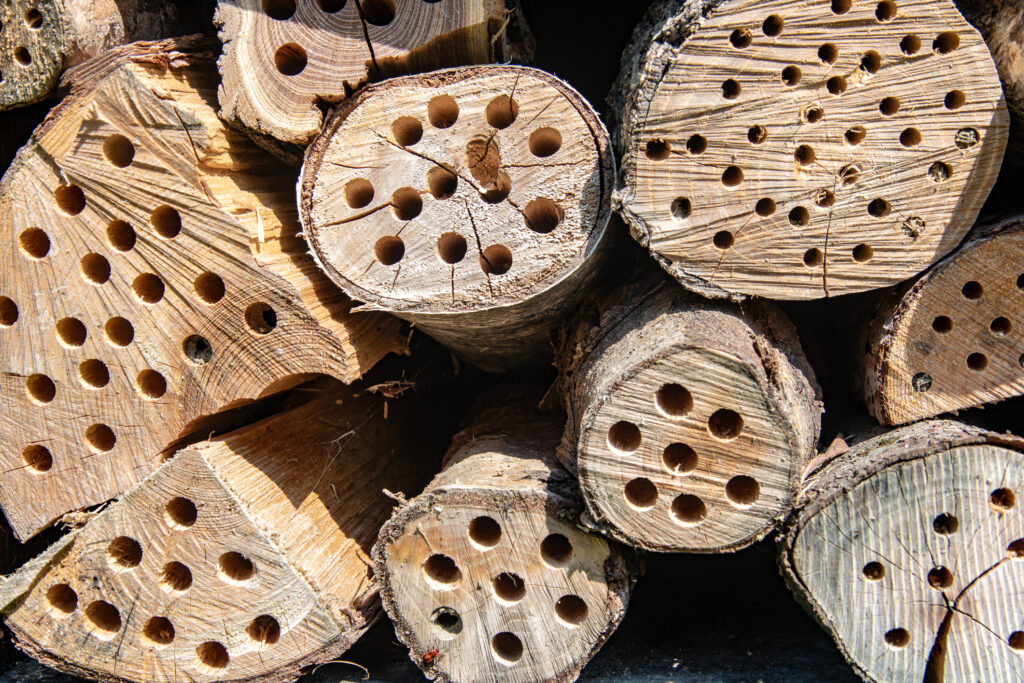
This design is perfect if you have some logs or sticks laying around and if you want to create a more natural-looking insect house. All you need is some logs or large sticks of different diameters. Create a pile and consider drilling holes into the larger logs.
Design 2: The Recycled Material Insect House
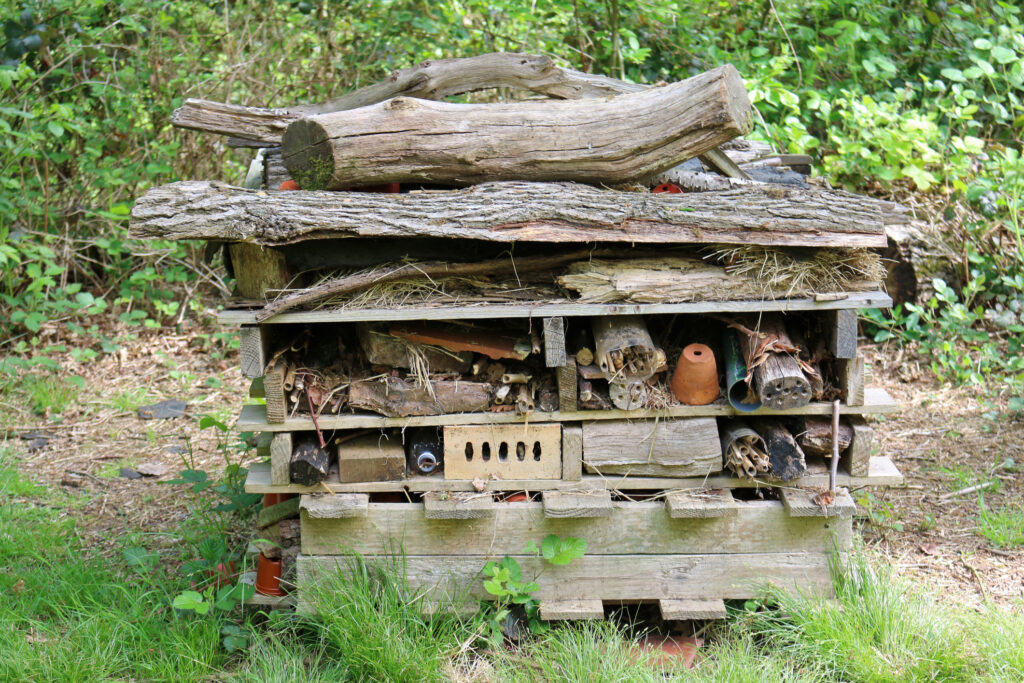
This design is perfect if you want to upcycle some materials you have around the house. Whatever you can find, from plastic bottles to yoghurt pots, old bricks to wooden pallets. Turn your junk into something useful and beneficial for local wildlife.
Design 3: The Wooden Box Insect House
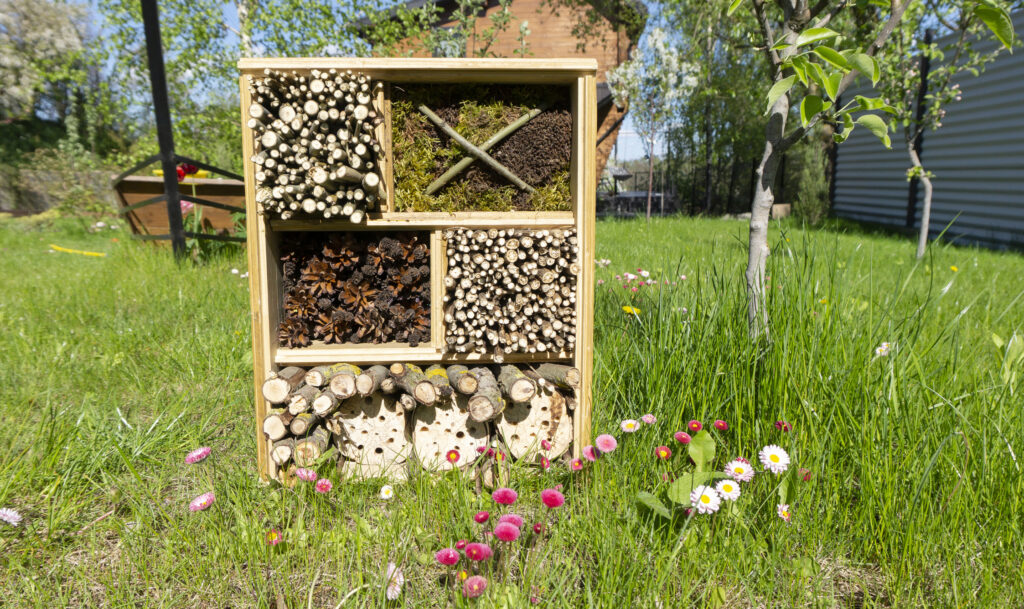
This design is perfect if you want to create a more structured insect house. It’s also great if you want to be able to move your insect house around easily. All you need is a wooden box or crate (even and old drawer would do the job) and a hammer and nails. You could also cover the face of the box with chicken wire to hold everything in.
Design 4: ‘Terracotta Towers’ Insect House
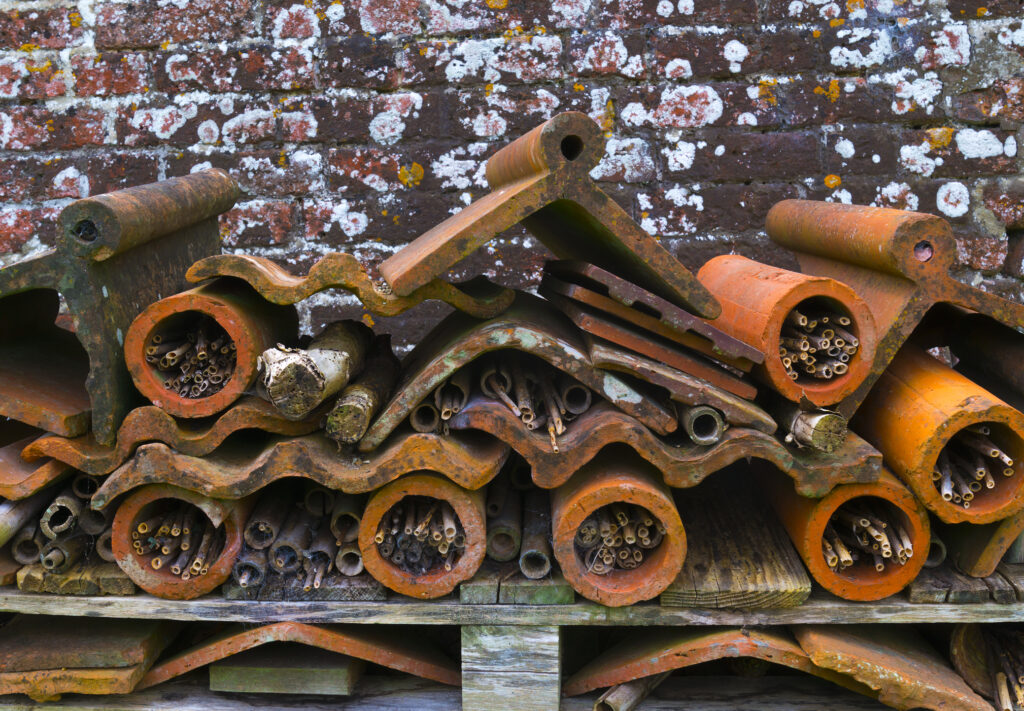
This design is perfect if you want to create a more eye-catching insect house. It’s also great for using up spare terracotta bits and pieces. Ideally you’ll need things like different-sized terracotta pots, drainage pipes and roof tiles.
Design 5: The Hanging Bug Hotel
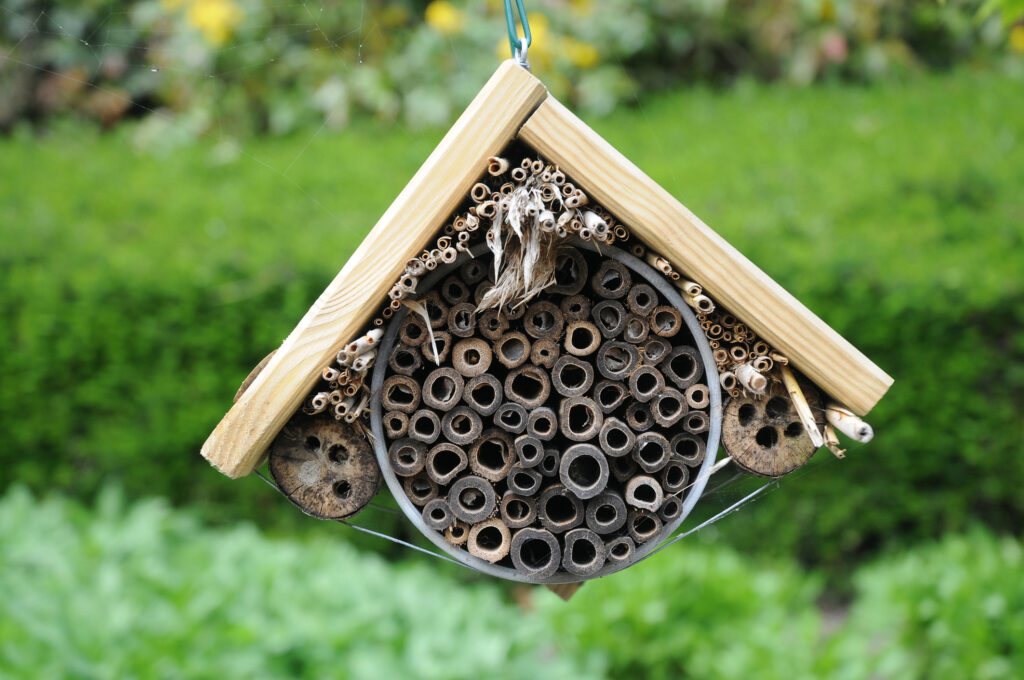
This design is perfect if you want to create a more decorative insect house. It’s also great for small spaces or if you don’t want your insect house to take up too much ground space. All you need is a wooden frame, some materials to place inside and perhaps some chicken wire to keep everything in place. Add some hooks or nails to hang it up with and you’re all set. You might choose to hang several small insect houses with different materials, rather than trying to cram everything in one place.
How to Attract Beneficial Insects to your Insect House
Now that you’ve built your insect house, it’s time to start attracting some insects. There are a few things you can do to make your insect house more inviting to them.
Add some plants
Insects are attracted to both the nectar and pollen of flowers. To attract even more insects, try planting a variety of flowers that bloom at different times of the year.
Add a water source
Most insects need water to survive, so adding a small bowl or dish of water to your insect house will provide them with the hydration they need. Just make sure to change the water regularly and clean the bowl or dish to prevent mosquitoes from breeding in it.
Add some food
You can also attract insects by adding a small dish of fruit or vegetables to your insect house. Just make sure to change the food regularly and to clean the dish to prevent mould from growing.
The importance of keeping your insect house clean and well-maintained
Inspect your insect house regularly for any signs of damage or decay. If you notice any problems, fix them as soon as possible. Clean out your insect house every few months to remove any debris or dead insects. As the materials in your insect house start to break down, add new ones to replace them. This will help provide a comfortable environment for the insects and encourage them to stay.
Tips for Positioning Your Insect House
When positioning your insect house in your garden, there are a few things you should keep in mind.
- Choose a sunny spot: Most insects prefer to live in warm, sunny areas.
- Choose a sheltered spot: Insects also like to stay out of the wind and rain.
- Keep it close to a water source: Many insects need water to survive, so it’s important to keep your insect house close to a source of water.
- Keep it away from predators: Predators, such as birds, snakes, and spiders, can quickly decimate an insect population. To protect the insects in your house, keep it away from areas where predators are likely to be found.
- Remember that if you make a small and lightweight insect house, then you could even hang it up on a wall or fence.
Which Direction Should an Insect House Face?
There is no right or wrong answer when it comes to which direction your insect house should face. However, most people believe that south-facing houses are the best choice because they receive the most sunlight. If you live in the northern hemisphere, a north-facing house will also work well. In the southern hemisphere, a south-facing house will be your best option.
When Should You Build an Insect House?
In general, it’s best to build your insect house in the spring or summer. This is because most insects are more active during these seasons and will be more likely to move into your house. However, you can build an insect house at any time of year. Just keep in mind that it may take longer for insects to find and move into your house if you build it during the winter.
Do Insect Houses Actually Work?
Insect houses can be an effective way to attract and protect beneficial insects in your garden. However, they are not a guarantee that you will see more insects in your garden. Many factors can influence the number of insects in your area, such as the time of year, the weather, and the type of habitat nearby. If you build an insect house and don’t see an increase in the number of insects in your garden, don’t be discouraged. Just keep in mind that it may take some time for the insects to find and move into your house.
Final Thoughts
Building an insect house is a great way to attract beneficial insects to your garden, and it’s a fun project for the whole family. In this article, we’ve provided you with all the information you need to go away and build your own insect house. Remember that it may take some time for the insects to find and move into your house, so be patient!
We’d love to hear about your insect house. What kind of design and materials did you use? And most importantly, which kinds of insects have you seen moving in? Tell us all about it in the comments!
