Are you wondering where to start with changing your garden layout? Perhaps you just moved to a new house? Or finally decided to sort out the garden after a long time putting it off?
Whatever your reason for wanting to create a new garden layout, it can be an overwhelming challenge.
A quick google search will bring up all kinds of garden design layout ideas, but it’s unlikely that you’ll find something that’s both exactly to your liking and suitable for the outdoor space available to you. What we need then, is a logical approach – taking all the best things that you look for in a garden and making them work in whatever space you have.

Here’s a 5 step guide to designing your perfect garden layout…
1. Evaluate your outdoor space
Grab a pen and paper and let’s go outside. We need to look at your garden space and weigh up everything there is – the good, the bad and the ugly! This process requires you to be honest and thorough. Don’t rush it, as this is your chance to realise both where the problems are and where the potential lies in your outdoor space.
First, lets draw up a list of what you like and what you don’t. Draw up a list of two columns – The good and bad…
The Good
As you walk around your garden area, make a note of everything that you like. It could be an existing feature, or a plant or tree that you’re fond of. Perhaps you have a nice view from a certain spot? What bits would you definitely like to keep? Are there any hidden treasures that you could make better use of? Perhaps an old pond could be cleaned up and rennovated? Are there any materials around the garden that could be used for another purpose or ‘up-cycled’. What natural features are a benefit to your garden? Is it a good size and shape? Are there nice warm areas that get the sun all day? What about a secluded area that feels cosy and private? What is the quality of the soil like – would it be suitable for growing new plants?
The Bad
Now for the less appealing aspects… Is there a particular part of your garden that you’ve been trying to ignore? Are there any eye-sores or unpleasant views? Perhaps your garden is exposed and you’d like more privacy? Maybe, like me, you have a heavy clay soil which is boggy all winter and like concrete all summer? Are there shady areas where it might be hard for plants to grow? Is there a slope that could cause you some problems? Perhaps your garden is exposed to winds and feels cold and uninviting.
Continue to walk around your space and maybe even try sitting in different places for a short while. Make some notes about how you feel. Which bits are desirable and which bits are ‘bugging’ you?


Create a garden wish-list
Now it’s time to get visualising – and we can get a little carried away here, that’s ok. Let’s have a think about what your perfect garden would look like. What kind of features might there be? In terms of style, what kind of theme would it have? Would it be natural and rustic or contemporary and formal?
We don’t have to be entirely realistic at this point – sometimes it’s just nice to dream and we can always reign ideas in a bit later on!
It might help to consider the following questions…
- What would you like to see in your garden? e.g. greenery / trees / flowers / colour / contemporary style / ornamental plants / wildlife etc…
- What would you like to do in your garden? e.g. relax / sunbathing / play games with kids / grow fruit and veg / entertaining / barbecues / exercise etc…
- What would you like to have in your garden? e.g. patio / deck area / pond / ornamental tree / sculpture / lawn area / shed / workshop
Thinking around these ideas should help you to visualise how you’ll spend time in your garden and what kind of features will give you the most value.

Image by Gerhard G.
Organise your ideas
By now, you should have two things…
1) a list of the good and bad elements in your outdoor space
and
2) a wish-list of all the ideas you’d like to include in your ideal garden layout
Now we need to organise all of those things into a short-list of ‘must have’ garden features…
Take your wish-list and short-list your ideas into priority order – starting with the non-negotiable, absolutely must-have(s) being at the top working down to ‘nice-to-haves’ and ‘could live without’s’ towards the bottom. If you share your garden with a partner or your family then you’ll need to consider them too of course, so there might be some level of compromise, where everyone’s no.1 requirement can be included.

Image by werner pfenningberger
You can then cross-reference this short-list with your garden’s good and bad points to see where the opportunities might be. Admittedly, this is not a science and the exact process will depend on your circumstances but, in general, try to look for the obvious places where ideas naturally combine to create ideas and solve problems.
For example, could that shady concrete patch be an ideal place to set up a barbecue area. Could the fruit trees on your wish-list also be used to add some privacy to an exposed, overlooked spot? And could that ugly bare patch of ground set away from the house be an ideal place to lay some turf and create a safe lawn area for the kids to kick a ball around on?
You might reveal at this point, that there is unavoidable groundwork to be done, in order to achieve your vision. For example, a sloping garden might not be practical for a patio and so there might be some landscaping required. Of course, how much of this gets the go-ahead will depend on your available budget and how much you have your heart set on certain items.
Draw up a plan
By now you should start to have a much clearer picture of how you’ll use your garden, what key features you want to include and a rough idea as to where everything might go. If you can visualise it then great, but it’s usually best to sketch things out – either on paper or using a garden design app.
It’s really useful to look at some kind of visual representation of your garden layout, as it may help you to spot potential issues or ideas that you’ve missed. It also means that you have something to discuss and refine with other family members or to show trades people if you’re getting any help with the hands-on work later on.
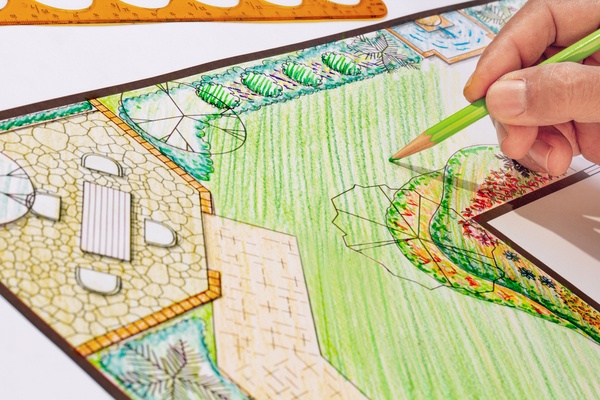
Draw a basic plan view of your property and surrounding grounds, including the edges of building, doorways, paths, trees, shrubs, beds and other basic features. You might also want to add markings to indicate which areas are effected by the good and bad points listed earlier. Before adding your new layout to the plan, it might be an idea to scan / photograph or photocopy this basic map, in case your planning goes wrong and you want to start drawing your design again. You may even want to create multiple versions of the new design. Using a dedicated app, such as the Gardena Garden Planner is another good way to allow for changes later on.

Image: Gardena
Next, the fun bit! It’s time to sketch your new layout on the plan. Take all the items from your wish-list and start to fit them within your garden map. As you add each feature, you might use colours or shading to indicate certain areas or even images, diagrams and comments to illustrate how you want things to look.
As you’re adding different features and sections, try to consider how you’ll move around the space – do you need to add paths, steps or even fencing to divide up the garden?
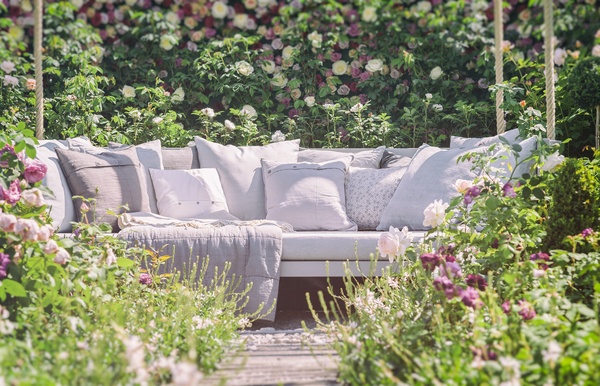
Many garden designers seem to talk about the importance of creating focal points and areas of focus. Seating areas are good to create a sense of destination which draws you into the garden. Consider how things will look from different vantage points – how will that wildlife pond look from the sun lounger? Can you safely see the kids playing from the patio area?
You might be thinking about plants at this stage too. You’ll certainly want to include any large, feature plants or trees within your design. For features like vegetable beds or flower gardens you might want to decide on what plants to grow later on. For now though, at the very least, have a think about what types of plants you’ll want to grow where. Go back to your good and bad points to check which are the sunny and shady areas, and which might be the most suitable.
Hopefully this process will help you visualise your new garden and allow you to explore how different layouts might work before doing it for real.

Image by Andreas Göllner
Make it happen!
Time to roll up those sleeves and get stuck in! The best thing about having thoroughly designed your new layout, is that you can just concentrate on one area at a time while keeping a holistic view of how everything will look eventually. Don’t worry if you feel overwhelmed and it seems a lot to do at first. Simply break your new plan down into projects. Which area would you like to start on first? Perhaps estimate how much time will be needed to get each project done, and then you can plan blocks of time to spend in the garden – weekends, evening etc… As each project gets completed, you’ll be another step further towards creating your dream garden. Of course, plans might change as you go along and that’s fine.

Image by Barry D
You might find it fun to document your new garden transformation. Take photos before and after each project and, if you’re feeling adventurous, you could even try recording some time-lapse video sequences to show how your work is paying off.
And just think…someday you’ll be able to sit with a relaxing drink in the garden that you’ve created and look back at how much you’ve achieved. Enjoy!