While it might still be dark and cold outside, there are many seeds that can be planted in the winter months. As the New Year brings with it new plans and ideas, it’s actually a great time to think about the garden and what you’d like to achieve. Perhaps you’ll try for bumper crops, or experiment with some new varieties. Perhaps you’re determined that your next Christmas dinner will include delicious home-grown sprouts!
Starting seeds in winter can be a great way to enjoy early crops or flowers and extend the growing season.
Whatever you’d like to grow from your winter sowings, there are a few things you can do to improve your chances of success. In this article we’re looking at 10 seed growing tips to get you started on the right track.
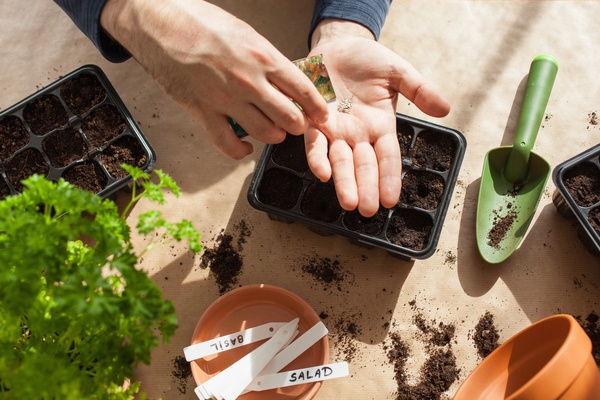
1. Grow Indoors / Undercover
We’ll start by stating the obvious – during winter, its probably far too cold outside to be growing baby plants. Therefore, you’ll need to sow your seeds under cover. If you have a greenhouse or cold frame, then this can be ideal, especially if it’s heated. Otherwise, you can simply find some space indoors where you can provide enough warmth and light – such as a bright, South-facing windowsill. It’s amazing what can be grown on a windowsill, and chances are that your home will be warm enough to germinate most seeds. It also means that your seeds are easy to keep an eye on, and you’ll have access to amenities like water and power, while you’re looking after them.
There are many purpose-made containers for starting seeds indoors – including narrow seed trays, pot holders and propagators that will fit on a windowsill. But you can also repurpose items like food containers and toilet rolls if you’d like to be eco-friendly and save some money.
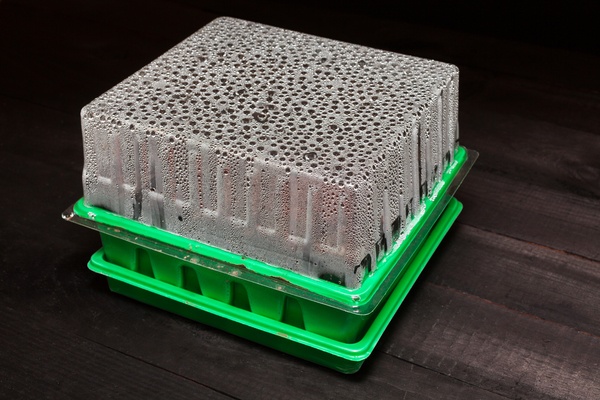
2. Use A Propagator
While it’s possible to germinate many seeds without a propagator, using one will nearly always improve your results. When seeds fail to germinate, it means you’ve wasted time waiting for them to sprout and also wasted space on the windowsill that could have been used for something else. Using a propagator will help to regulate the temperature of the soil and enclosed environment. They also help to contain moisture and prevent your soil from drying too quickly. Some cheaper types simply consist of a seed tray and transparent lid, while more expensive models can have electric heaters, timers and even temperature controls. Using a propagator should mean a greater number of seeds germinating, and will also allow you to grow a wider variety of seeds.
Extra tip: If you want to regulate temperature and moisture without a propagator, then at the very least you could cover seed containers with some cling-film.
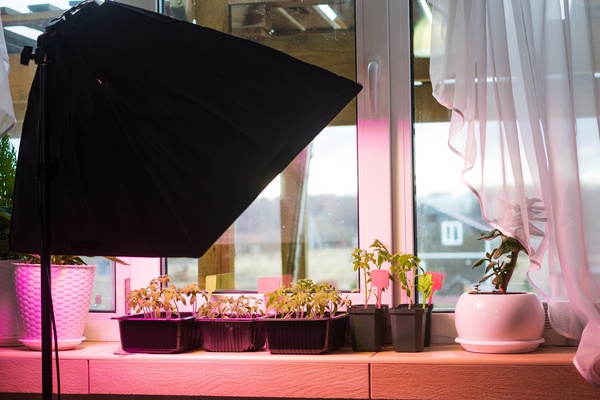
3. Use A Grow Lamp
The winter months can be pretty dark and grey, so getting enough light can be a problem for emerging seedlings. A common result of this is weak, leggy seedlings that droop over from their own weight. Using a grow lamp can help to avoid this problem and raise strong, healthy plants from day one.
Ideally, your seedlings will want a nice bright light source from the very moment that they poke through the soil. Once they’re sprouting, most will ideally need something like 12 – 16 hours of bright light every day. But, how bright is ‘bright’ you might ask?
For context, a 60w incandescent light bulb will typically provide around 800 – 900 lumens. Direct sunlight however, can provide beyond 100,000 lumens – so no contest there perhaps! However, when looking at grow lamps, it’s worth knowing that the lumen rating is not always the best indicator to pay attention to. Plants rely on specific parts of the light spectrum in order to grow, and so many grow lamps will account for this and provide a calibrated light source – often concentrated towards red and blue light. These lamps are designed to give your plants what they need in the most efficient way, and so they’re much better than just grabbing any light and hoping for the best.
Tip: If your memory is anything like mine, then it’s worth using a timer to switch your grow lights on and off. This just makes sure your plants get just right amount every day – even when you’re out or busy.
4. Choose The Right Compost
It might seem obvious, but starting off your seeds in the right compost is pretty much essential if you’d like to grow healthy young plants. When it comes to compost, there are various ‘qualities’ that you might pay attention to; acidity / particle size / moisture retention / nutrient content / organic matter content / maturity…and so on… In my opinion, it’s best not to over complicate these things. For growing seeds, I normally reach for the bag that contains any of the following – “Seedling Compost” / “Seed Sowing Compost” / “John Innes Seed Compost” / “Seed & Cutting Compost”. This compost will be light and fine, making it easier for sprouts and new roots to push their way through the soil. It will also have good moisture retention, appropriate nutrient content for new seedlings and a neutral pH (acidity) rating. It’s best to avoid using old compost, especially if it’s been kept outside and opened, as it might have been inhabited by pests or bacteria. It’s also worth remembering that seeding compost is great at the start, but your seedlings will quickly require something with more nourishment once they get going – covered in tip no.10.
5. Measure Conditions
Sometimes it’s easy to see whether your new seedlings are happy or not. But what if you can’t? Or maybe your seeds haven’t germinated and you’re wondering why? There are very inexpensive devices available, which can give you some insight into your growing conditions. Often referred to as a ‘soil tester’, these multi-functional tools will usually include a probe which can be inserted into your compost and indicate the soil pH level and moisture content. Some will also have a light meter and thermometer, which are also very useful for checking the conditions are just right for whatever you’re growing.
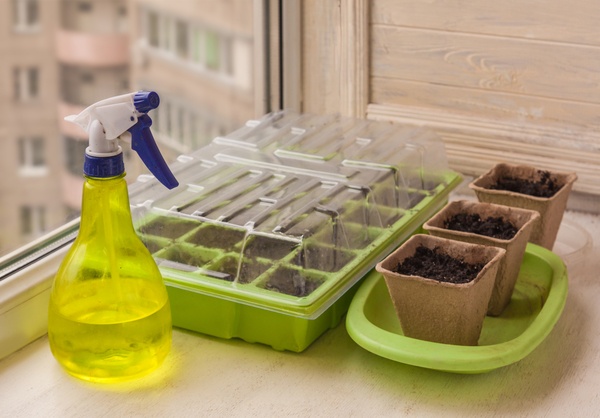
6. Water Carefully
Watering method, amount and frequency is very important when it comes to growing seeds – especially when growing indoors early in the year. ‘Damping Off’ is a well-known disease which can rip through your baby seedlings leaving them ruined. This is caused by mould or fungi which thrives in cool, damp conditions, and so watering too much or too often adds extra risk. It’s usually best to let the soil dry out a little between watering – although not too much of course. When it comes to adding more water, it’s best to either mist the soil with a spray bottle or add water to a tray underneath the seed containers. Wait a while for the dry soil to absorb the water – you should notice that it becomes damp right the way through to the top. You can then pour any excess water away and then repeat the process when the soil starts to dry out again.
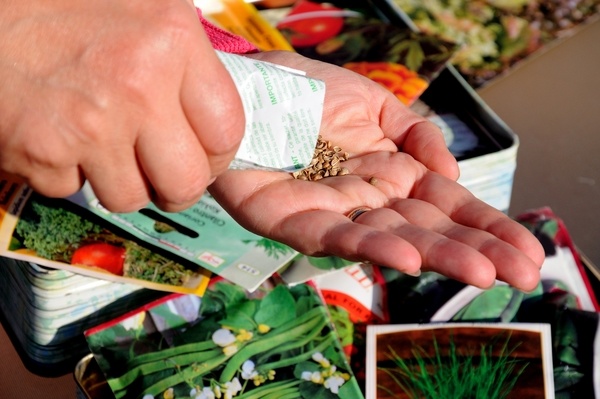
7. Use Quality Seeds
Many people will insist that seeds are still viable and can be used way past their printed ‘use by’ dates – and I’d have to agree. However, when it comes to early indoor sowings I nearly always like to start with fresh seeds from a reputable supplier. The thing is, I just don’t think it’s worth taking the risk of taking up valuable windowsill space with a bunch of seeds that may never germinate. Unless you have a large, heated greenhouse you’ll probably be pushed for space – especially once seedlings start to grow and get established. If my seeds don’t germinate because I get the planting or the conditions wrong, then we can live and learn. But the last thing we want is to waste valuable growing space on seeds that were never going to work. The whole idea behind early sowing is to get a head start on the year and extend the growing season. Use fresh, good quality seeds and give yourself the best chance of success.
8. Make A Sowing Plan
Reading the back of a seed packet and following all the instructions can sometimes be confusing. There’s all kinds of information to help you get it right – the best temperature for germination, how long it takes, when and where to plant the seeds, how to care for the seedlings, and so on… Trying to retain all of that information for multiple types of seeds is an ambitious feat, even for a seasoned gardener. Therefore, I like to simplify all the main points (especially timings), and record them all in a sowing plan. You might use some scribbles on a notepad, a pin board on the wall, stickers and notes on a calendar or even a spreadsheet or app. Whatever works best for you, it can be really useful to sit down with all your seed packets and plan out a rough sowing plan for several weeks head. I find it easiest to divide my growing space into blocks or trays. For example, I might give my sweet peas one of the first slots, as I can start them off the earliest. I know that they should germinate within 2 weeks and that I’ll lift them out into bigger pots 2 weeks later. That means that block will be occupied for the first 4 weeks on my plan before I can allocate it the next lot of seeds. Planning this way helps you to keep on top of everything when things start getting busy.
9. Keep Things Clean
We mentioned the threat of ‘damping off’ in tip no. 6. Another way to avoid this disease and other such problems, is by maintaining good hygiene in your growing area. Always wash seed trays and pots well before using them and as mentioned before, always use fresh compost – and not from the garden. Be careful when watering not to splash water around and mop up spills immediately to avoid unnecessary damp areas.
It’s also a good idea to provide some fresh air and ventilation. Opening a nearby window occasionally may help – but of course this might mean a drop in temperature so you’ll need to do so carefully. Another option is to place a small fan nearby to help keep the air moving. Something like an oscillating desk fan might be beneficial for growing healthier seedlings, as a small amount of movement will help them to grow stronger stems – ready for the breezy outdoors.
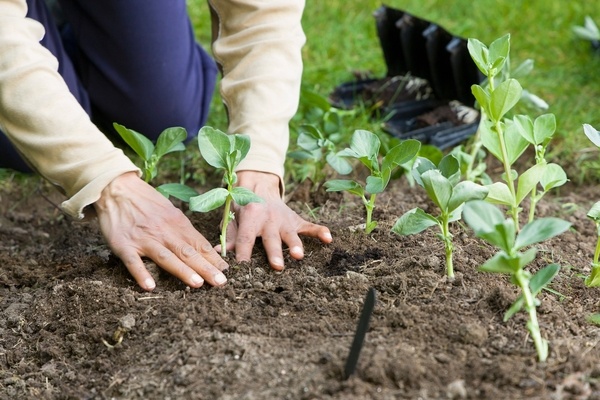
10. Pot On Your Seedlings Promptly
It’s worth remembering that the conditions required for germination are not always quite right for your new, young seedlings. Once they sprout, they’ll need plenty of light but also the right levels of nutrition in order to thrive. The nutrient content in most seeding compost won’t be enough to sustain seedlings once they get going. They can quickly outgrow their container too and left too long could eventually become pot bound. There’s no hard rules on when you should pot on seedlings and it will vary from plant to plant. As a rule of thumb, it’s thought that once a seedling has three or four ‘true leaves’, then it’s time to pot them on. Other indications might be if the seedling has stopped growing or has yellowing leaves. If it’s beginning to look ‘unhappy’, then it could be time to introduce a bigger pot and some richer compost.
Final Thoughts
So, growing seeds early on might come with some challenges. Hopefully these tips will help you grow some fine young seedlings and be ready for to hit the ground running once the weather picks up. Some tools and extras mentioned may cost a little at the beginning, but will certainly help to get the best results. If you consider how much you’ll save by growing plants from seed instead of buying plants later in the year, then really getting setup properly can be a worthwhile investment. After all, you can use things like propagators and grow lights year after year.
With a little care and planning you should be growing everything you need for a productive happy garden later in the year. Happy growing!
What will you grow this year? What has worked well for you in the past? Any more tips you’d like to share? Let us know in the comments below.
Some good tips Will. I started growing a few favourite veggies about 5 years ago in a couple of raised beds. Some successful, some not. Would you suggest refreshing the soil in the raised beds each year?
Hi Kath, thanks for that and glad to hear that you’ve been ‘growing your own’. I find for every success there are usually an equal number of ‘challenges’, so don’t worry if not all goes to plan! I believe that the general consensus is that you don’t need to replace soil in raised beds. Many folks talk about ‘amending’ the soil each season – basically adding organic matter / additives to replace nutrients and help with the soil structure / water retention etc… What you should add will partly depend on what you intend to grow, as some veggies like richer soils than others. A lot of people also rave about the ‘no dig’ philosophy these days, and so I think there are likely benefits of simply adding to the soil at the top, rather than disturbing the layers below. One thing to watch for with container growing though, is that crop rotation may be less easy to manage, and so if you’ve had a lot of problems with pests and intend to grow similar crops from year to year, then more of a refresh may be wise. Best of luck!